The Ultimate Guide to Getting Started with Embroidery
Embroidery is something I had wanted to try for a good while but had never had the time for. So when the first lockdown was happening, I figured it would be the perfect opportunity! I spent some time practicing, and have made a few pieces over the year.
It’s been so therapeutic, and easier than I anticipated! I’d highly recommend it to anyone who is looking to pick up a new hobby or is itching to learn something new.
I’ve had a lot of people saying they want to learn, so I put together this quick and easy guide to help you get started!
Buying Your Materials
First, you’ll need to get started with the right tools. You can buy starter kits on Amazon or Etsy, and possibly even at a local craft store (although I haven’t seen any at the ones I’ve been in to) or you can buy the materials individually.
The benefit of the kit is you have more than you need in one swift purchase. You’ll get loads of sizes and options of each material so you can really experiment. But the con is that these can be pricier than buying materials individually, can (depending on the seller) be of lower quality, and also can be wasteful as you will likely not use all of the materials.
I’m going to be linking products from Amazon/Etsy UK as they’re the easiest to order from my area (and the most universal). But it’s always amazing to support local businesses, and I do try to get my materials locally when store are open.
Choosing Your Hoop
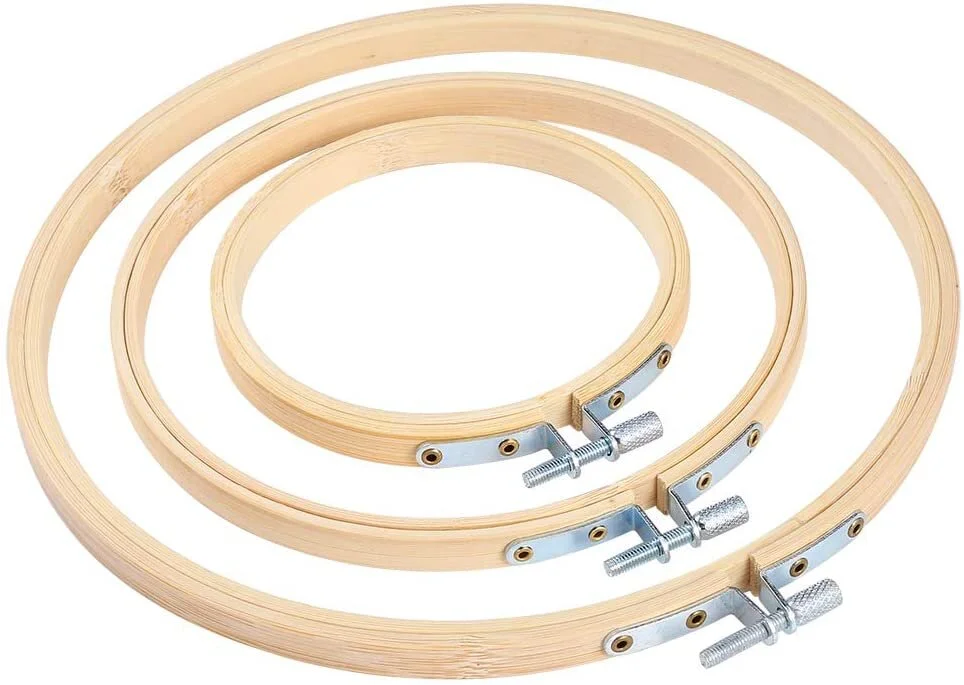
The projects you have in mind will dictate the size you want. If it’s a smaller piece you won’t need as much area to work with. If it’s got a lot more detail, you’ll want a bigger hoop so you have more room to work as you get used to embroidering. I recommend getting these 3 sizes to play around with just to get started:
There are a lot of shapes that you can play with though, so once you get more comfortable, have fun!
Needle & Thread
The most popular thread brand is DMC. But to get started, and so you have plenty of colours for whatever projects you want to practice, it can be really helpful to get a bundle of thread like the one below. Plus, you’ll get a few useful items like a needle threader and cards (these are to wrap your thread around so it doesn’t tangle while you use it). I’ve found that the smallest needles are the best for most embroideries, but it depends on the material you choose to work with.
Fabric
Cotton fabric is the most common material for embroidering, but you can use whatever you have lying around. Denim, printed images, tulle, have fun!
I think fabric is easiest to get locally because you can see the texture and have control over the amount, but there are options online too:
Transfer Pens
I go into detail later about different transfer methods, but heat-erasable pens are my favourite. I tried a different type first and quickly realised that these ballpoint ones are the easiest to work with because they give a thinner line so you have the most control. Plus, this pack comes with all the colours you’ll need to work on any colour. Once you’ve finished your stitches (or if you mess up while you’re drawing the design), use an iron, steamer, or hair dryer to get rid of your lines.
Thread and Accessory Storage Case
As you work on more projects, you might find you want a storage case and more cards to wrap your thread around. This keeps everything nice and tidy, but isn’t necessary to get started. The numbers can help you to keep track of your colours once you purchase your own so that you can match colours you’ve already used in a project if you run out! You can also wrap your thread around clothespins if you need a quick solution.
Hoop Stand
Also very much optional, and I don’t use one myself, is a hoop stand. This can help you with posture if you need it, but I’d recommend trying to stitch without to begin with.
Small Scissors
You can obviously just use any scissors that you have at home, but if you’d like to get a smaller pair that make getting in to the small thread easier, there’s some cute options out there. Plus, they’re easy to travel with if you take your embroidery with you on the go!
To make things super easy, I’ve added all of these items to an Amazon List to get you started!
Setting Up Your Hoop
Once you have all of your materials, you’re ready to set up your hoop. The below video is really useful and goes into detail about threading your needle and getting the fabric nice and tight so that you don’t have a slack tension while working.
Practicing Stitches
Before you get started on an actual project, use a space piece of fabric to practice. Get the hang of different stitches, thread counts (3 is most common, 1 is tricky and for fine details, 6 is the max), and what it’s like to make different shapes. There’s a ton of methods and stitches, but learn the basics first below to get started.
Transferring a Pattern
There are loads of methods of transferring your pattern onto the fabric, but honestly it’s down to your personal preference (and the project you’re working on). You can print on the fabric, transfer with different types of materials like iron-on or wash off papers, or my favourite method so far that’s been the simplest is to use heat-erasable pens (linked above). Research, experiment, and see what works best for you!
Your First Piece
You can create your own design using a font you like, your own drawing, or tracing an image. Or, there are plenty of pre-made templates online either on blogs or Etsy! The great thing about Etsy is you don’t have to worry about figuring something out yourself - you just browse, find something you like, and you get to support an artist. You also have the option by browsing only stores in your area, if you want to support local or find designs specific to your area.
“Finishing Off” Your Embroidery
There are many ways that you can enjoy your art. If you chose to embroider clothing, you can obviously just take it out of the hoop, iron carefully or steam to get out any wrinkles, and wear as normal. You can cut the fabric to size to fit into a frame of choice, either a normal frame or a glass frame. Or, you can keep it in the hoop and use the clamp to hang it on the wall.
If you choose to keep it in the hoop, you have a few options: Leave the hoop as is, stain it, paint it, decorate it, or wrap it. Research and experiment to find out what you like! Here is some inspo:
I like to trim the fabric down quite a bit and hot glue it to the hoop in the back so that it’s tidy. If I’m giving a piece as a gift, I like to sandwich another piece of blank fabric on the back so that the messy backside of the embroidery is tidied. Again, there’s loads of options, so research and find your fave.
Did I miss any questions? Let me know in the comments if I have, and what you’d like to see me embroider and maybe I can write/film more on this in the future!


